 |
| Bryony models one of my spotty big bags- notice the mauve colour that I used for the inside. |
I have often seen bag making felting workshops advertised but when I have checked the dimensions of the bag I have realised that it is a very small bag; and even some felting kits that are available online are for tiny bags, the kind of bag that I call a ‘wedding handbag’.
So I decided that if I was going to run hand felted bag making workshops it would be to make a practical and roomy handbag; the type of bag that I would like to use everyday.
I made my first All SensesArt 'big bag’ back in Summer of 2011 and I have been using it everyday since. Over the months it seems to have softened and moulded to my body shape...a bit like an old Harris Tweed jacket, so it has actually improved with age!
I have run several day long AllSensesArt Felted Big Bag workshops since making my own so I thought it was time to share some of my creative process.
 |
| This is how much it will shrink in size! |
I used a favourite bag as a guide for the shape and proportions that I wanted my bag to be. From experience I know how much shrinkage to expect so I scaled my outline up and then cut a template from plastic. I like to use the builders' roofing plastic that is easily available (and very cheap) from builders merchants like Wickes and B&Q.
 |
| Laying out the wool takes time but is worth the effort. |
To get a good finish and to help reduce the chances of the surface of the finished bag pilling I laid out twelve very thin layers of wool fibres (six layers on either side of the plastic).
This is much better than laying out fewer thick layers.
 |
| I love Cate's choice of rich colours and flamboyant design. |
Even in a day long workshop there isn’t really lots of time to lay out a very complex design. At the beginning of the session we make our own two sided pre-felt i.e. with two different colours of wool fibres so that it can be used either way up. I often keep my decoration simple by cutting circles, but simple flower shapes, leaf shapes and other geometric shapes are all possible.
Extra decoration can be added using whisps of other coloured wool tops or fluffy knitting yarns such as mohair.
 |
| Cate. These projects can seem enormous at this point! |
As we are working on a large scale I have kept the size of workshops quite small- with just four participants per workshop. This means that everyone can have a table to themselves and also that there is enough room when we need access to the kitchen sinks (the hall that I have used has two stainless steel sinks which is great).
 |
| Cutting open to remove the template and further work the handle strap. |
It is always an exciting moment when the fibres are felted together enough to cut the template out. But not the time to get too relaxed as there is still quite a bit of felting to be done to further shrink the bag!
 |
| Getting smaller but not quite there yet. |
 |
| Trish with her finished bag. For her design she needs to sew on her orange and red felted handles. |
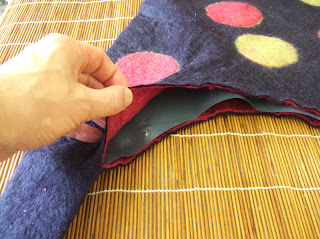
Some people like to add a magnetic closure but I have opted to sew a gusset of heavy duty satin lining in with a zip closure. I really like this as it isn’t visible from outside, doesn’t spoil the way that the bag hangs and makes sure that everything is secure inside.
 |
| Cate's completed bag; it is fantastic! |
If you would like to make your own felted big bag with me then just get together a group of friends or work colleagues and I can run a full day workshop for you. I need just four people to be able to run these full day classes for only £69 per person. These classes are usually held at Martin Heath Hall, Christchurch Lane, Lichfield, Staffordshire. WS13 8AY but if you prefer I can come to a venue of your choice.
Cost: £69 (this includes all wool fibres, use of equipment and tea coffee and biscuits).


