Showing posts with label Children's Craft Project. Show all posts

Sunday, 3 March 2019

First Sewing Machine Garment Making Project ... all while in Hospital!


-->
Making a scrunchie is easier than you think!  

I recently qualified as a Design and Technology Teacher but I’ve already been teaching Textiles and Art in a range of educational, health and other alternative situations for several years. 

I recently worked as a temporary teacher as part of the Becton Hospital Outreach Team; in this role, I worked as a Teacher at Sheffield Children’s Hospital. 

I worked with students with all sorts of health issues and diagnoses but that’s not what this blog is about; this is about young people’s desire to learn to sew!

While at Sheffield Children’s Hospital I taught a range of subjects including; Maths, English, Science, Art and also Textiles. 

Having access to the Hospital School Teaching Team was a way for students to keep up with school work as set by their usual school teachers. It is also a way to have access to teachers to tutor them one-to-one so they can use this time to get to grips with anything that they have found tricky at school and want to spend some extra time on. Finally, it is also an opportunity to do something completely different from their normal school work. 

C was one patient who was very interested to hear that I had access to the teaching team's sewing machine AND that I was able to use her hospital school lessons to teach her how to use it.

C very quickly picked up the basics of threading up the sewing machine and in our first lesson she also made a small stitch sample ; all this despite having to wear an oxygen mask

We found this cute fabric and matching cord in the classroom stores so I suggested a drawstring bag as a first sewing machine project. C used straight stitch and zig-zag stitch in this project. This cute little bag is a present for her little sister, F.


As soon as she had completed the small drawstring back C asked if she could make  a garment. 

Flexibility is hugely important in hospital teaching and I wasn't sure exactly how many more lessons C and I were going to have together but I was really excited by her enthusiasm and wanted to find a way to do my best to make this hospital stay have some positives in terms of C having some fun and learning new skills.

C suggested a small top for her two year old sister and once I knew that she would be in hospital for a few more days I researched possibilities.


A BIG thanks to www.itsalwaysautumn.com for this downloadable pattern for a little girls' Flutter Sleeve Top

What's not to love about mini pompom braid? 


In this first garment making project C learnt:
  • How to thread the sewing machine correctly (top and bottom threads).
  • How to wind thread on the bottom bobbin.
  • How to select appropriate stitch length and width. 
  • How to use reverse button to reinforce at the beginning and end of a line of stitching.  
  • About Warp and Weft threads, Selvedge and Fraying 
  • How to ensure that pieces were pinned on the Straight Grain
  • Some key pattern terminology ('Place on Fold' and 'Cut Two')
  • How to use dressmakers pins to pin out pattern pieces and also to pin garment pieces together Right Sides Together
  • The importance of Tacking before machine sewing; I do always stress this in my lessons, firstly as it is much safer than leaving metal pins in while machine sewing and also because it invariably means that sewing is neater and more accurate and reduces the need for any unpicking.
  • About Bias Binding and how to use it to neaten curved edges such as the arm holes and also to form a Casing to thread the neck edge elastic through. 
  • About snipping Concave Curves to ensure a neater finish (the armhole edges).
  • How to use a safety pin to thread elastic through casing / channel. 
  • How to use zig-zag stitch to neaten the seam edges. 
  • How to Top Stitch (lower edge and sleeve hem edges) to give a neater and more decorative finish.


"Wow! And to think that just a few days ago I had never sewn before and hadn't even threaded a needle... And now I can use a sewing machine and have made this! "
I was delighted that C 'powered on'. She used her positive attitude, enthusiasm for learning and desire to make a fabulous present for her little sister to get her through this project. She worked to a really high standard and finished it JUST BEFORE her hospital transport came to take her home! I am pretty sure that she will have her own sewing machine before the year is out. 


The timing was perfect as this all happened a couple of weeks before series 5 of The Great British Sewing Bee started on BBC TV. 

One book that I suggested that she buy is Sewing Machine Basics by Jane Bolsover 


Wednesday, 27 June 2018

Completed BTEC Level 2 Textile Masks (Carnival module)


My exemplar mask to give students an idea of how they might combine some techniques 
Here I am finally catching up and uploading my final selection of photos of student BTEC Level 2 Module Carnival Project work. This is a follow-on from the previous post which showed some of the students’ inspiration images and also how their first pieces of wet-felted base fabric turned out. 

These year 11 students had already experimented with some other textiles techniques:


  • Couching
  • Appliqué 
  • Reverse appliqué (Mola) 
  • Stitch and slash 
  • Machine embroidery 
  • Melted Angelina fibres 
  • Machine patchwork 

It was now time for them to review these techniques and consider how they might be incorporated along with the hand-made felt into their final mask designs. 

Making a start: leaf/ petal shapes cut from melted Angelina fibres and stitched in place. Plus some carnival sparkle added by hand-stitching silver sequins in place.
Angelina fabric was ruffled to add texture to this mask plus this student added her multi-coloured felted beads.
Good to see how this design developed as the student learnt more textile techniques.

A mask with added feathers, machine appliquéd ribbon, hand made felt and wet felted multi-coloured beads.

Excellent use of the heart shapes that this student had originally added as decoration to his base felted fabric. Plenty of surface interest and movement in this mask.
This student used fabric crayons to decorate a piece of calico with a design that he had previously sketched in his workbook. He then machine appliquéd the decorated calico onto his hand-made felted base.
Here the base for the mask was made from a fabric made using the Reverse Appliqué (Mola) technique. Next strips of handmade felt were machine appliquéd in position.
A glue gun is the perfect tool for attaching the wet-felted beads (once completely dry) to the mask base.

See more School Felting projects http://www.allsensesart.com/schools-projects

Monday, 28 August 2017

Fabulous hand-felted Fedora

Left: inspiration- a computer generated image of a Fedora found on the internet. Right: the hand-felted reality (made by L, a 12 year old student)
I love working with kids; I love their ambition and enthusiasm; and there’s no where quite like a Special School to find young people (with Autism) who are determined to complete their vision.
 

While working as textiles teacher at Brantwood Specialist School, Sheffield (Mar 2015-Nov 2016) I had the privilege of working with a broad range of students with various special needs including Autism and PDA (Pathological Demand Avoidance) and guiding them through various, completely unique, textiles projects.

The Felted Fedora made by L, a fairly new student to the school, was completed in my last few weeks at Brantwood. L (aged 12) had spotted the felted top-hat which had been made by one of the senior students at the school and he decided that he too would like to make his own felted hat. The major difference was that the older student was a fairly experienced felter and L had no previous experience of felting at all. But it is pretty impossible to say no to a student who is determined on a project and so, even though I knew that I only had a few weeks left at the school, I let him go ahead with his project.

We used two colours of Norwegian wool fibres, sky blue and lavender, to make L’s Fedora. Norwegian Wool is really suitable for; felted hats, slippers and handbags because it results in a firmer felt and is less prone to pilling than Merino wool fibres.

The first step in making a made-to-measure felted hat is to measure the circumference of the wearer’s head. Other measurements of importance are; the depth/ height of the crown and the width of the brim. You also need to know how much shrinkage to expect during the felting process. I phoned Maggy at www.norwegianwool.co.uk to check my shrinkage and then got my pencil and calculator out to work out these measurements (see photo below).

L wasn’t very involved at this stage partly because of his special needs and also partly because I knew we had a very limited amount of time left until my leaving date.
However he was involved with every other stage in the process and was very focussed on his project. 

I then drew out the bell shaped template on a piece of paper and cut out a resist from stiff builders' plastic. 
L also watched several videos on YouTube which explained the need for a Hat Block. I let him research suppliers and costs of hat blocks and then explained how we could economise by making out own hat block. Give a student a saw and a block of polystyrene and they are obviously going to enjoy the (messy) practicality of this wet-felted hat project! 


The first layer of the 'laying-out' process
Building up the layers until there were five layers of wool fibres on each side of the plastic resist
Flipping the wool/ plastic 'sandwich' over and rubbing to felt the wool fibres together.


After rubbing, rolling in a bamboo at is another method of tangling the wool fibres together.
L cutting through the felted layers to remove the plastic resist.

Tossing the wet and soapy and fedora. This tumbling action is yet another method of continuing the shrinking process.
Still some work to do! 
Over the next few textiles sessions L progressed through his wet felted Fedora project. He seemed to enjoy all the stages but especially the process of shrinking the the fedora onto his own bespoke hat block and the finer detail of the shaping of the top of the crown and the curve of the hat brim.


Marking and cutting the brim to size.  


Rinsing the soap out.  

L worked to get the achieve the traditional Fedora shape.


L made design decisions as his project progressed. He decided to finish the edge with bias binding made from fabric that he had found in the textiles store cupboard at the start of the project. 
Adding a red gem to the front of the crown was the finishing touch. 


L was incredibly proud of his hat (and quite rightly so!) He went on to wear it at school and at home every day for almost a year. This was also an excellent experience for me as his teacher- it was so good to see a young student's confidence blossom. I was lucky that my head teacher gave me the freedom to run projects which were bespoke to each student as this enabled me to achieve so much more success with students in this Special School. 


Sunday, 24 August 2014

Children's art and craft workshops using all sorts of materials and techniques

3 colour lino cut print. Design was inspired by a slapstick circus routine
I’m an artist who enjoys working with a wide range of materials. 
Back at Lichfield College when I had finished my Foundation Course in Art and Design the external examiner commented that because of my abilities in such a wide range of techniques and materials I actually had a choice of artistic directions that I could follow.

As it turns out since graduating from Manchester Metropolitan University in 2006 I have mainly been making mixed-media sculptures (using textiles, found objects and industrial scrap) but more recently I have also made collages and now two short films too. www.frillipmoolog.co.uk 

In my outreach work www.allsensesart.com I have mainly specialised in wet felt-making. 

This has been for two reasons. Firstly I discovered the therapeutic properties of the wet felt-making process and have found that it is an amazing medium for relaxing participants and I have devised a range of techniques which have made it accessible to people with a wide range of abilities. I am very proud that I have been able to work with people of all ages and abilities and that I have helped to empower them and to raise their self esteem.

The second reason is simply the practical issue of storage space for workshop equipment and materials.

But it is good to remind myself of all the other creative activities that I have led over the years and which I am sure I will continue to do as and when opportunities arise.

Some of these have been workshops led on a voluntary basis and others have been me working as a professional freelance artist.

At Lichfield College I did several years of life drawing which I was quite accomplished at however my heart was always in non figurative work and especially in mixed media. 


Collage of images from magazines on a handprinted base. 
I had a very strong art education a school and we did a lot of drawing. I found that I especially enjoyed dramatic pencil work and also using indian ink for drawing.


Study of butterfly wing- watercolour and indian ink
I was delighted when I was able to include a drawing session in the felted firebird project for Wirksworth Festival  
The children’s bird drawings were so wonderful that I digitally scanned each of them and resized them and then made a digital file which could be printed and assembled into a beautiful little zig-zag book. 


Drawing with non-conventional materials is also great fun. In some of my sessions children  and young people have used pipe-cleaners to ‘draw’ 


Pipe-cleaner 'drawings' made by a young person in Ocean Ward Birmingham Children's Hospital
or in my sessions with Foundation 3D design students we have used wire, springs and straws amongst other things.
3D Drawing made by a Foundation Level student at MMU
Of course these mixed-media materials lead onto sculpture so making vegetable creatures is an obvious creative session. It is especially good as it is enjoyed by children of all ages from the very young upwards.


Vegetable Creatures made by children at John's Lee Wood Family Camp 

Since 2004 I have run several creative workshops for children and families at an annual  family camp John’s Lee Wood in Leicestershire.


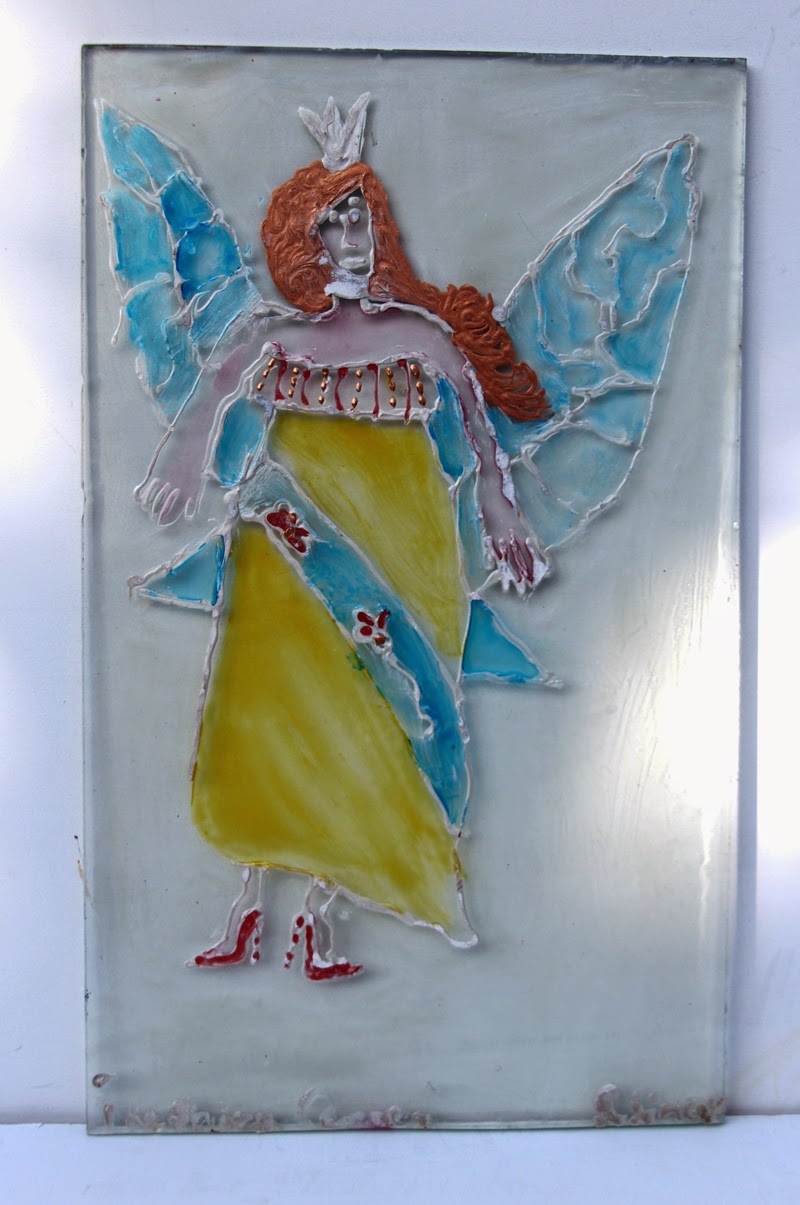
We have done glass painting sessions several times. Painting on jam jars which we later used as tea-light holders and also using offcuts of glass supplied by a local glazier. 


A beautiful angel painted by a 10 year old at John's Lee Wood Family Camp
We have made our own paper by making paper pulp from shredded, old maps, paper bags etc.

I enjoy working with recycled materials so I developed a workshop where we made badges by embossing designs on recycled aluminium drinks cans. This was an idea that I developed which was inspired by metal artist, Val Hunt’s, work. 


Making Peg Dollies was a lovely session. Once made, the children used the dollies as puppets and we even had a session where we interviewed the children and asked them all about their dolly; his or her favourite food, hobbies and favourite TV programme etc.


Peg Dollies are always a favourite with all ages of children. I made this one!

On occasions at John’s Lee Wood Family camp I have also assisted in workshops which have been led by other artists - willow weaving workshops and mini hooked rug making sessions are two which I assisted with. 


Chris and Jack doing some willow weaving at John's Lee Wood Family Camp

small patches of hooked rug are really effective addition to this teenage boy's bag

In the last couple of years I have broadened my skills even more and have experimented with Fimo polymer clay. Using a pasta maker to make millefiori patterned beads which are then assembled to make a butterfly brooch is simple when you know how! 

And finally, Card-making is a relaxing activity and even more fun when you do it with a friend for company. 

And I have even had a hand-made card sent to me by a young lady to say thank you for the craft birthday party that I ran for her.